Showing posts with label Creating. Show all posts

Saturday, October 26, 2013

{31 Days of Coastal Style} 10 Sea Creatures You Can Make Yourself!

Wow, I can't believe we're only 5 days away from the end of this 31 Day series! I really can't believe that I've only missed blogging on two of them (and that was when we went to a conference out of state!) It feels good to be back in the blogging saddle. :)

Today's post isn't going to be very long because, well, it's already been written for me :) Click on over to The Shed to find a round-up of TEN tutorials for making your own starfish, coral, seashells and even driftwood (perfect for making one of those driftwood projects!) Make sure to tell the lovely Laura that I sent you! ;)

DIY Sea Life: 10 easy ways to make faux seashells, coral, driftwood, and more!
DIY Sea Life Round-up from "The Shed"

Also, I would be remiss in not mentioning the tutorial I posted earlier this month-- how to make your own faux ceramic coral!

DIY Faux Coral Tutorial

What have you been DIY-ing lately? Any sea creatures? Or maybe just "DIY-ing" dinner for your family? ;) That's where I'm off to next...

Thursday, October 10, 2013

{31 Days of Coastal Style} 5 DIY Driftwood Projects


If you were inspired by yesterday's "Embarrassingly Easy DIY Driftwood Sign Tutorial," here are five more driftwood projects to REALLY get your crafty wheels turning! (Remember how I told you yesterday that the number "five" seems to be a reoccurring number for us? Well, here it is again!)


Mrs. "Creative in Chicago" shares a genius tutorial on making a beautiful driftwood orb! (You'll have to see what she uses!)


The lovely and creative Jen from City Farmhouse shows how she made a stunning starburst mirror from driftwood-- for the amazing price of $3.00!


"Creative in Chicago" also shows you how to make a gorgeous, ginormous seahorse wall-hanging from collected pieces of driftwood! (You could also make it with twigs in a pinch, if you can't find driftwood where you live...)


The talented Jennifer Rizzo made not one, but THREE driftwood signs, all from wood that survived Hurricane Sandy!


Last but not least, Shayna of The Wood Grain Cottage(I just LOVE her blog!) gives this tutorial for a huge but easy driftwood mirror, which I love especially because it happens to resemble the one from my coastal entryway inspiration!

So there you are-- 5 more gorgeous driftwood projects! Can you tell I love driftwood? ;)


P.S. If you don't leave near a beach or lake, did you know you can buy driftwood by the lot on eBay? Granted, it's not free, but it's better than no driftwood at all! ;)

Did you miss any of the other 31 Days of Coastal Style posts? Check the list out here!

What is your favorite material to create with?  Do you enjoy working with wood? Or fabric? Or plastic canvas?


P.S.P.S. Check out the rest of the "31-Dayers" over at The Nester's blog!

Wednesday, October 9, 2013

{31 Days of Coastal Style} Easy DIY Driftwood Sign Tutorial

I have a confession to make. When it comes to crafts, I am NOT Martha Stewart. Or Ana White. Or even Karianne of Thistlewood Farms! For me to make a craft it must be: a) cheap (as in, preferably free), b) easy (like do-it-with-my-eyes-closed), and c) not involving a tape measure. (Let's just say: measuring tapes and I do not get along...)


So that's why this driftwood sign project was right up my alley. Free? Check. Easy? Check? No measuring involved? Double-check. Seriously, I'm almost embarrassed to call this a "tutorial", because, really, there are only two items necessary: a big piece of driftwood, and a paint pen (oh, yeah, three if you count a pencil)-- and it took less than five minutes from start to finish!


When I found this big, long piece of driftwood (at Pictured Rocks National Lakeshore on our Fourth of July family day), I knew immediately what I was going to do with it, and where it was going to go. I knew I was going to make a sign with it (similar to these), and that it was going to go in the beach-themed bathroom of our new apartment (even though we weren't even moved into said apartment yet)! But for some reason, it took me forever to actually get around to making it!

But on to the tutorial:


1) Steal Borrow your hubby's white paint pen. (Or if your hubby doesn't have one, you can always buy one at your local craft store, or on Amazon here- though that would take this craft out of the "free" category, and into the "costs a couple bucks" category) ;)

2) Decide what you want your sign to say. 

I knew I wanted mine to say "BEACH", and a distance. I picked 5 miles because a) that's the approximate distance from our house to the Michigan lakeshore (give or take a mile or two, and b) the number "5" is pretty easy to write nicely. ;) (Oh, and "5" also happens to be the number of people in our family, and the last digit of the year that Mr. Superman and I started courting & got engaged-- so I guess it has some familial significance, too-- now that I think about it!)

3) Lightly sketch out your words in pencil, to determine where and how big you want your letters to be.


4) Trace over your pencil marks with the paint pen.


Mine were a tad too skinny after one "go-round", so I went back over them a second time to make the lines more thicker/visible.


5) Stand back and enjoy your handiwork! :)


BTW, to hang my sign, I screwed two eye-hooks into the back of the driftwood, and strung picture-hanging wire between them. (Sawtooth hangers would have worked well too, but I was out of those.)


And in it's final resting place, my (soon-to-be-fully-revealed) bathroom:


Seriously, I feel embarrassed that a project this easy took me five months to actually break down and do it! (Hey, there's that number 5 again!) I'm so glad I finally got it done! Now it makes me smile every time I walk into my bathroom :)

Did you miss any of the other 31 Days of Coastal Style posts? Check the list out here!

Do you have a project you've been "putting off" for a long time? What are you waiting for? ;)


P.S. Check out the rest of the "31-Dayers" over at The Nester's blog!

Friday, October 4, 2013

{31 Days of Coastal Style} DIY Faux "Ceramic" Coral

Today I have what is probably the World's Simplest Tutorial for you! :) 


If you're anything like me, you've drooled over the decorative ceramic sculptures in stores like Target and Homegoods countless times. However, if you're anything like me, you've also a) had hiccups over prices like $19.99 (or even $130, for Heaven's sakes!) for a small decorative accent that b) you've realized will most likely last only 2-3 days max in your little-child- (and clumsy-adult-- who, me?) -inhabited home.


So when I saw, and swooned over, a white ceramic coral figurine like the one above (pretty sure it was at Target, but now I can't find it on their site :( ), I decided there had to be a version of it I could find make myself that, a) wouldn't cost an arm and a leg, and b) could be displayed without constant fear of breakage!

Enter stage right: (drum roll, please)........ the Walmart aquarium aisle! 


Yep, the same aisle with the tiny glass fishbowls, little plastic pirate ships for your pet beta to "sail", and tanks full of goldfish floating swimming happily. That's where I found this pink beauty! It's perfect-- only $4.88, and best of all, lightweight, rubbery plastic that will withstand ANY two-year-old! Only problem, the Pepto-bismol-ish color = not exactly my style. BUT, nothing that my best friend and super hero, Mr. Spray Paint, can't change!

Sadly, I don't have any pics of the process, but it's PRETTTY basic-- remove pink coral from packaging, find safe place to lay it out (or hang from wire on garage ceiling, like I did, so I could spray all sides at once), and give it several light coats of white spray paint! I chose to go with matte paint vs. gloss, since that was what I had-- but you could use high gloss spray paint if you prefer a more "ceramic-like" finish. And.... TA-DA!


Ain't she bee-yoo-ti-ful? :)


So next time you go shopping-- keep your eyes open! You might find a new decoration in the most unexpected place! ;) (And remember, with a coat of paint, ANYTHING can be transformed. Well, I don't know about children-- I've never tried spray painting them...) ;)
So now I want to hear from you: what's the craziest thing you've ever spray-painted, or turned into a decoration? Please tell me!!!


P.S. Check out the rest of the "31-Dayers" over at The Nester's blog!

Friday, April 5, 2013

What's Cooking in the Kitchen? A $15 Mini-Makeover!


Pin It!

Yes, it's true-- I just gave my kitchen a mini-makeover for only $15, and about 15 minutes of work! (If you don't count the 3 1/2 hours I spent scrubbing the myriads of spots, dried spills, and splotches that plague  light-colored cabinets... but that's another story!) And how, you ask? The answer: a simple hardware swap!

BEFORE: even from a distance, the  brass & porcelain handles look drab and dated (and if you looked closely, you'd see that the "brass" was corroded and brown-- hence the "wide-angle" shot)

AFTER: the smooth chrome is the perfect modern counterbalance to the traditional cabinetry!
Ahhhh, soooo much better! Sleek, shiny, and up-to-date! Wanna know a secret? I found them at Goodwill! (Shhhh...) Yep, a bag of 7 beautiful handles, exactly what I'd been looking for to replace my sad, corroded "brass & porcelain" handles that constantly looked grimy. And the whole bagful was only $1.49!!!


Unfortunately, I needed more than 7 handles-- I needed 10, to be exact, plus 4 drawer pulls. Fortunately, my local Menards happened to carry the exact same handles, so the extra ones only added up to $13! Bringing the grand total for my fabulous updated kitchen to $15-- well, $14.49, to be exact ;)


Of course, if I hadn't found that bagful of handles at the local thrift store, this makeover would have cost about $21 more, but the total makeover would still be a not-too-shabby $34! (Possible even less, depending on what hardware you chose!)

This update was especially important, because THIS is the view that you see as soon as you walk in the front door of our apartment:


(I'm still trying to figure out what to do to the front of the island, that won't detract from everything else.) Here's the other side:


Our kitchen cabinets were actually store displays, so my Superman took the two lower center ones (where the stove is now), and turned them into an island, flanked with open shelves! I sewed the curtains that cover the shelves out of a tablecloth about three years ago (back when I was into the floral, cottage-y style). I think I need to make a new set that match my new colors, & the stylin' new cabinet pulls! :)


Another thing I want to do very soon is put a backsplash up behind the stove area. I'd love to do glass tile, or even penny tile (*swoon*) but I'm afraid that's out of my budget right now (unless I find some at Goodwill!) But I might try my hand at some paint & stenciling!


A gratuitous flower shot... I never buy fresh flowers for myself, but a sweet friend got me these for my birthday! I love the "freshness" they bring!


As you can see, my kitchen is not very large, and it is (literally) the center of the house-- the living room is to the left, and the dining room is to the right (with bedrooms opening off of those). So this $15 update visually impacts the whole house! I'm so happy with the effect this simple change has!

So what do you think? Have you done any inexpensive updates that have a huge impact on your home? Any quick tweaks?



Tuesday, January 8, 2013

The Christmas Cards That Weren't


I had very high hopes for our Christmas cards this year. I've never gone the professionally printed route (mostly because I'm too cheap... LOL), so each year I spend hours designing the "perfect" Christmas card to remind all of our far-flung relatives what our family looks like ;) This year was no exception-- I laboriously selected the photos, created a layout, and tweaked it over and over again until I was happy (I always have a hard time being "satisfied" with my own work, but this one I actually liked!)


But then, the unthinkable happened. When I hit "print," our printer gave a cough, shuddered, and collapsed. (Well, okay, maybe it wasn't that dramatic. More like, I pressed "print", walked away (fully expecting it to do its job like always), and returned 5 minutes later to find a stack of photos with hideous white streaks across them!) One way or the other, after much research, troubleshooting, and weeping, our printer was declared deceased-- and the soonest we could afford to replace it was AFTER Christmas. :(

This meant that December 25th came and went with nary a Christmas card in the mail. This in itself is, unfortunately, not a new thing for me-- I am known to deem it acceptable as long as the cards are in the mailbox by December 31st! But when the calendar changed to 2013, and my Christmas cards were still giving me the stink eye from my computer, I gave up and went to Plan B-- New Year's cards!


Granted, these are not nearly as fancy-- I literally threw them together (on Microsoft Publisher) in less than 15 minutes! But the best news is, with a blank inside, they double as "thank you" cards for all of the gifts and cards we have received! I think I may have just started a new tradition!!!

So here's my big holiday tip to you: if you want to cut extra stress before Christmas, skip the "Christmas cards"-- just mail a New Year's thank-you card that contains the annual family picture/relative-reminder as well! Hooray!!!

So what is your holiday card M.O.? Do you design your own Christmas card, or do you fork out the money and let someone else handle it for you? Do you adhere to the traditional schedule of pre-Christmas card mailing, or do you (accidentally or on purpose) choose to wait until a different time to send your annual letters?


Wednesday, January 2, 2013

2012: In My Rear-View Mirror


Pin It!

Wow, where did this past year go?!? I've heard people say that time flies faster as you get older, but I sure hope that's not true, because 2012 went by so fast it made my head spin! So I guess I'll join the "Year-In-Review" club, and refresh your (and my) memory about what went on here at "A Heartful Home" last year!

May 2012:

I started this blog! ;) My very first post was, Home Is Where My <3 Is. My personal favorite post of the month was my first furniture makeover: My "Chair" Lady! My most popular post of the month, however, was my 99¢ Goodwill chandelier-- it has received 893 pageviews so far, and is currently the third most-viewed post on my entire blog! I guess people like crazy-good thrifty finds! ;)

June 2012:
June kicked off a summer of nautical inspiration: from my nautical thrifting finds,
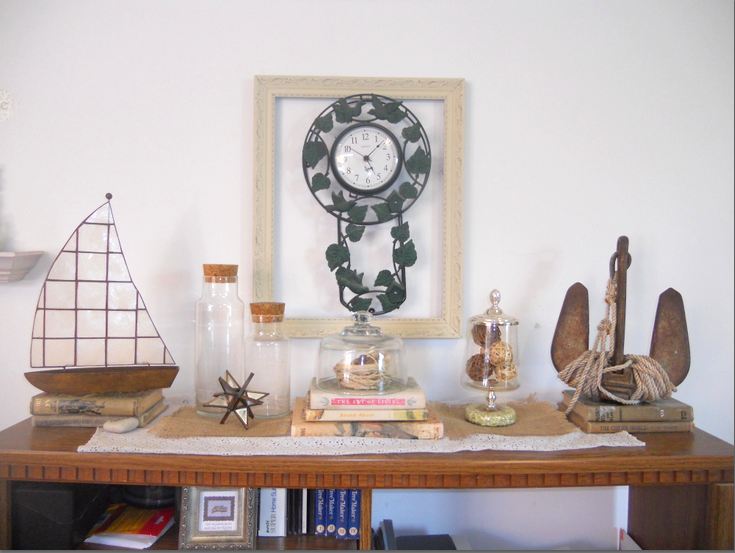
to my nautical bookshelf, and my neutral nautical "mantel"!

June was the month of super rummage sale-ing, and I scored BIG, both in thrifty finds AND in pageviews! My two most popular posts of all time were Thrifty Treasures Monday: What A Haul! (when I found a console table for $5 and five dining rooms chairs for $20), and the reveal of the Chalk Paint Console Table makeover (with homemade chalk paint!)-- both have received over 1,000 hits!

July 2012:

My favorite post in July (and quite possibly my favorite furniture makeover EVER) was the neutral Union Jack/Jacques side table! The most popular posts of July, according to pageviews, were my DIY Seashell Topiary, as well as more thrifty treasures- Ironstone and Old Gates!

August 2012:
August also featured this wicker basket-chair makeover, and my first pillow-making attempt!

August was another month with several popular posts! I showed you how I freshened up my kitchen by changing out the accessories above the cabinets, and confessed to some serious Target envy (& acquired my first ceramic owl!) I also did my first "blog-techie" tutorial, on "How To Truncate Your Blog Posts".

September 2012:

September was another successful thrifting month-- I hit the Junker's Jackpot (aqua Mason jars, old windows, and RH-look-alike pendant lamps, oh my!), plus I found a giant original canvas painting for $5 and a real vintage "Farmer's Market" sign!

October 2012:
I shared my neutral autumn bookshelf, plus a FREE printable fall sign!
October was a month of makeovers-- I turned a humongous green vase into a Pottery-Barn style lamp, spray-painted a pair of ceramic owls (to replace my poor Target owl, who suffered a tragic fate), and rescued my under-sink kitchen cabinet. But the month's most popular post was my first (and only) "recipe" post, for "Cream of Anything" soup mix! (It is also my most-pinned post!)

November 2012:

Call the tabloids! In November, I got a facelift and confessed to a love affair-- though it didn't seem to bother my husband, thankfully! LOL ;) I also shared some pictures of the world's cutest kiddos (though Guinness hasn't ruled on that one yet)

December 2012:
I never did formally "reveal" my blue-and-green Christmas tree (oops...),
but you did get a good glimpse of it in my post on decorating with camouflage!
In December, I didn't blog as much as I wanted to... but I did manage to share an easy DIY Christmas tree garland (that also happened to be FREE)! I also posted a round-up of 10 Christmas Gift Ideas under $10! (Go ahead and pin it for next year-- because if 2013 goes by as fast as 2012 did, you'll need it sooner than you could ever think!)

So there you are-- 2012 in review! (Of course, that's just a basic overview-- check out my Project Gallery for an exhaustive list! Trust me, I'm exhausted just reading back over everything!)

Thanks SOOOO much to all of my awesome followers! Whether you follow through GFC, Linky, or Facebook, you make me so happy! And I can't wait to see what 2013 has in store for A Heartful Home! One of my goals is to start a link-up party (woohoo!) I also plan on doing more room reveals-- even if the room isn't quite "perfect" (in my eyes) ;) (Will it ever be?)

Sooooo... what kind of posts would you like to see in 2013? 
Do you salivate over garage sale/thrift store finds? 
Are you more of a craft person? 
Or do you prefer the big picture of room reveals? 
Maybe you'd like to see more "personal"- type posts? 
And why, do people say "a penny for your thoughts", but you put in your "two cents worth"-- isn't that a ripoff???

Either way, happy 2013, folks!!! :D